The word Kermesse may mean festival or fair. I decided to use it for this blog, since here I would present a festival of crafts and arts done by myself... and 365 refers to the number of days in a year. The idea started churning in my mind when I came across http://makesomething365.blogspot.com/. The main concept of my blog is to show a piece of art or some craft on a daily basis for 365 days. Some of them I’m well familiar with, while others are completely new. Hope you’ll enjoy this year long journey and feel free to leave any comments.
Showing posts with label Card-making. Show all posts

Wednesday, 27 April 2011

Day 67 Wedding Card Ready - getting stuff for Mother's Day cards

The wedding card has been finished (complete with insert) and since Mother's Day is practically round the corner, I started working on card making!


The material needed is as usual. But I am using an egg cutout from a previous project, and it will act as a sort of vase.


While the colour on the egg piece was drying up, I applied some glue on the outer edges of the card and applied corded pearls.


The paint has dried up ready for the next coat... probably need 5 in all.


The fabric flowers had a pearl bead stuck in the middle, while the other flowers (paper-like) had a flat backed pearl applied!


The egg's place was traced on the card so I could apply the flowers while the paint was drying... yet again & again ;-)

Day 66 Wedding card material & design

Here are the photos for the material needed for the card, and also a rough design. I still need to get more items...


Sunday, 3 April 2011

Day 43 Fan card

Hello to all. I got the pattern for this card on a CD with a card-making magazine and I liked it straightaway. You can also find it here: http://www.craftsuprint.com/card-making/fan-sheets/fan-pyramage-various/winter-bluebirds-fan-sheet.cfm


The parts of the fan were cut and numbered on the back so that they are in the correct order. Double-sided foam tape was applied at the overlaps and then parts attached to each other working from the right (13) to the left (1).


See ya!

Thursday, 17 March 2011

Day 26 Iris Folding Clover

Happy St. Patrick's Day to all :-)


Iris folding is something I only tried since starting this project. It is very easy to do, especially if you have the pattern! I decided to do the clover through inspiration of St.Patrick's Day.

As before you'll need patterned paper, scissors, card for background, craft knife, pencil and ruler. You will also need a hologram paper for the iris piece. I put a nice shiny sequin with a bead in the centre for iris.


The work doesn't look astonishing from the back but once you turn the card over, you're in for a surprise!


For more info go to http://kermesse365.blogspot.com/2011/03/day-21-iris-folding-teddy-bear.html

Have a lovely day x

Monday, 14 March 2011

Day 23 Cross Stitch

I'll be doing some cross stitch next. I used to do this craft for quite some time but had stopped mainly due to lack of time. I enjoy doing it and it gives fantastic results.


I have a kit which includes everything you need for the cross stitch piece, usually Aida fabric, thread and needle. You will also need a pattern which I produce a second copy of to be able to mark on it as I stitch along.


Have a lovely evening x


Thursday, 3 March 2011

Day 12 Card insert & 3D decor foil

Card insert
You will simply need an A4 paper (if insert is for A5 card) and some imagination.

I created this insert with MS Word, by first searching ‘frame’ in clip art and then applying words inside the frame. The frame needs to ‘be sent behind text’ in text wrapping (right click and go to format picture). I have also applied a paw print picture which I found on the net. This is sent to back & behind text again from format picture.


Type the greeting, print and fold in half. You can also cut the edges of the insert paper with scissors having a decorative cutting edge instead of a straight one. Also shapes can be punched with a card punch, showing the paper underneath. Put it inside the card and attach with double-sided tape or photo corners next to the fold... and it’s done!


3D decor foil
The corner on the card was decorated with a decor foil. This is another great way to decorate paper, wood, plastics, textiles and wax (as in candles). It is very effective when designing monograms as I’ll show here.

You need:
A5 colored paper
3D glue for foils
Decor foil
Stamps & stamp pad (optional the pic shows an acrylic block with clear stamp)
Pattern design


It is possible to create brilliant effects with the decor foil and the 3D glue for foils. I applied the 3D glue for foils directly out of the bottle and onto the paper to be decorated. I printed the design directly on the paper and went over it with the glue. The bottle has a medium fine nozzle and it is easy to use – given a steady hand :-P


The 3D glue for foils dries up transparently, but it remains sticky. Now you can apply the decor foil. Important: the metallic or coloured side has to be above and facing you!
Press on well and gently go around all the corners and then peel it off. Repeat on all areas as needed. You will be left with the colour from the foil attached to anywhere the glue is applied. Foils are available in different colours. Clean any tools with water and soap.


Enjoy trying them for yourselves. Take care x

Wednesday, 2 March 2011

Day 11 Card-making with Digital crafts

Yippee, the book has arrived, so when I'll have a creativity block I'll know where to turn to :-)

Soon - on the 14th of March - my Mum's pet dog will be 1 year old and this event gave me inspiration for today's craft. I am going to prepare him a card. He wouldn't care about a card but Mum would be pleased :-)


You will need:
A4 colored paper
Photo frame print out
Photos (here I need 2)
Scissors
Double-sided foam tape

The Canon creative park is aother great site for digital crafts:
http://cp.c-ij.com/en/ I found what I needed under Scrapbook followed by Photo frame, one with bones ideal for a dog.


Then I opened the picture in Paint and 'cut' out the bone shape. I printed it on the same paper as the frame. This is the groundwork for the card. I will take some proper photos and stick them to this card using foam double sided tape to give it a 3D look. I will stick the bones in the same way and over the photo... finished project tomorrow. Sorry but I have been too busy.

Here's a photo of the dog - called Kimy!


There is an alternate way to add photos to the templates of frames downloaded here. Please find instructions here: http://cp.c-ij.com/en/help/help-scrap03.html
I could not do it since I need program updates!
I will try it eventually.

Take care, love libellunina x

Friday, 25 February 2011

Day 6 Digital crafts

Super super busy day. Something quick... believe me this is quicker to do than write about. I wasn’t sure what to call today’s craft since it’s entirely done using a computer and printer. The only other thing you’ll need is paper and optionally some embellishments.

The internet is full of ideas for making crafts and one site that I like returning to is: www.hp.com/hho/hp_create/

Here you’ll find ideas for cards, iron-ons, photo borders and games that you can create online and print. Some of them you’ll have to print first and create later! The projects are divided into categories. Browse through till you find what you need.


I chose to create an Anniversary card online and print it.


The instructions are pretty simple to follow and it will help to have at hand the photo you want to add. You also have the space to enter a greeting and searching ‘Anniversary poems’ online surely helps.


You then upload the photo, drag it into the space provided, write the poem (choosing font, font size and colour) and you’re nearly done. Click on preview and print, choose the appropriate settings on your printer and press print.

Once the card is printed fold in half, write the greeting and that’s it. Well if you have a couple more minutes to spare you can decorate the card some more to further personalize it; just try to keep it simple!


Voila’...


Peace & love x

Sunday, 20 February 2011

Day 1 Card-making

Today’s craft is card-making. It is one of my favourites. It is quite simple, quick and effective and gives a full flow of your creative juices as you can apply anything. I like to keep it pretty simple and without too much fuss to keep a clean appearance. Inspiration comes from things and colours around me.

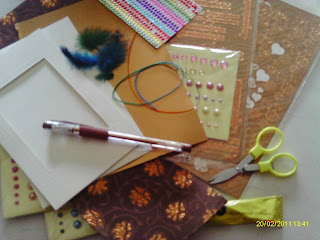
For this project you will be needing:

Paper
Glue or double-sided tape
Scissors
Embellishments
Peel-offs stickers (sentiments)
Card paper (here bought as an aperture card)
Envelope (here included with the aperture card)
Coloured pens

A note on embellishments: these are the items that make the card stand-out. They can be almost anything; 3D stickers, ribbons, feathers, things you do yourself, buttons, dried flowers, small gems and pearls, and other things you might find around your home or work-place. Some are bought for a few cents while others are a bit expensive.


Tweezers come handy when applying the peel-off (Congratulations). This card can be given to someone for graduation, promotion or an achievment reached. You can add the date to make it more personalized and even a name. As you can see it took only about 20 minutes – maybe add 5 more for finishing.


Enjoy and take care :-)